What’s here
When we set off on our last adventure we had no idea what to look for when choosing cameras for on-the-bike photography, but after taking hundreds of photos from the saddle I’ve learned a number of things that you’re likely to find useful. This post is all about providing you with advice for choosing the best camera for on-the-bike photography, techniques for getting the pictures you want, and how to get them without dying.
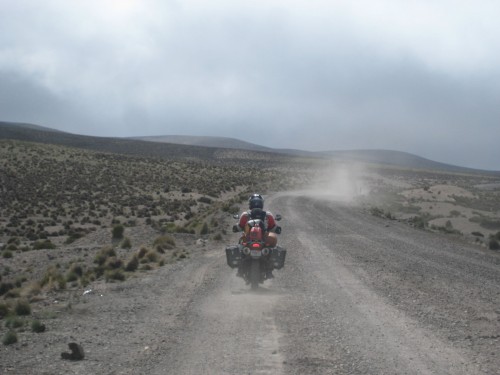
The pictures in this post were all taken while riding. Give me a moment to stand still and pull out the good camera and I can easily surpass the quality of any of these, but I’ve intentionally chosen pictures that should be representative, of what you can achieve with an affordable point-and-shoot while riding. You’re not going to get National Geographic level pics this way without years of professional training / practice, and a willingness to risk dropping a camera worth thousands of dollars. I’ve seen it done though, and the results can be stunning.
Why do it?
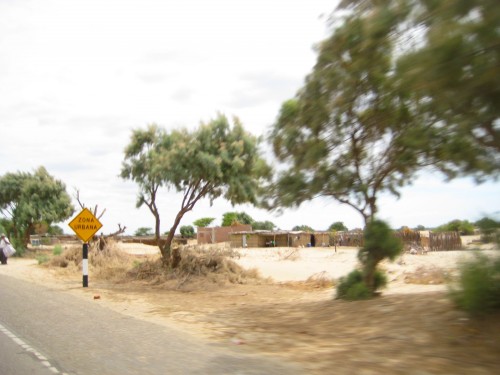
Many of you may be wondering “Why not just pull over and take the shot?” It’s a reasonable question. The answer is similarly reasonable. There are some shots that simply won’t wait for you to pull over,

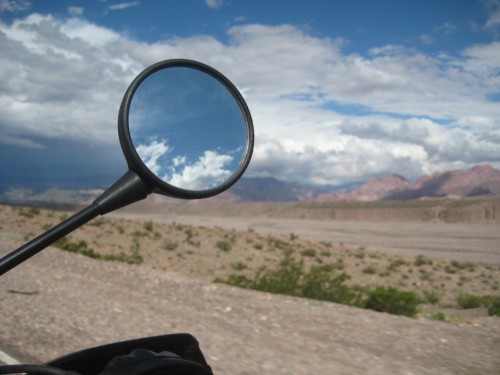
some shots you can only get while riding,
and some shots that wouldn’t be the same if you did stop.
Plus, stopping constantly to take a picture of every interesting thing you see gets annoying quickly, especially for people riding with you.
When your trip is over, the photographs you’ve managed to snap will be some of the best reminders you have of what you experienced, and the best way to share those experiences with others.
How to avoid driving off a cliff
Riding a motorcycle is dangerous. Riding a motorcycle one-handed much more so. Riding a motorcycle one-handed whilst manipulating a camera… It’s not the brightest thing you could be doing. But, if you are going to do it anyway, here are some good rules of thumb to help you not die in the process.
Before we even go there, you should never attempt to take a picture while riding until you are very comfortable with your bike. A good way to test if you’re ready to take pictures while riding is to ask yourself how freaked-out you’d be to ride with no hands. Does the idea of taking both hands off the bike still fill you with dread? If so, you’re probably not ready to start manipulating a camera left-handed while riding.
1) lanyard, lanyard, lanyard.
Running a lanyard from something on your bike to your camera won’t just keep you from loosing your camera. It’ll also keep you from attempting to catch it when you drop it. You will drop it. In fact, you should drop it. Drop it before you ride, to make sure it doesn’t become a safety hazard when it falls. Dropping the camera needs to become your default response when anything unexpected happens. It’s best to run the lanyard from your tank-bag, or coat. Having a $300 ( or more ) lump of plastic dangling from your handlebars can be very distracting at a time when you need as few distractions as possible.
2) Never attempt to use your camera when the road has shown a predisposition towards potholes.
It’s just not worth the risk. Hitting a pothole with only one hand on the handlebars can leave you hurtling towards the ground at high speeds.
3) Never attempt to use your camera on tight curves
There are definitely some beautiful curvy roads that are well built and just calling out for a picture of your comrades leaning into them. Don’t give in to the temptation. The two big problems here are that you’re more likely to misjudge the apex of the turn if you’re focusing on your camera, and that you never know when some idiot is going to come around from the other direction having drifted half-way into your lane.
4) Always have somewhere you can stash it quickly
In an emergency situation your first instinct should be to just drop the camera, but there will be many times where you’re not in immediate danger, but it’s in your best interest to get the camera out of your hand.
If you’re on tarmac the fastest place is almost always your crotch, but that won’t help you much off-road when you frequently need to stand. My tank-bag has a large pocket on the belly-facing side with a zipper along the top. When it’s unzipped it becomes a big waiting pocket that I can quickly drop the camera in. Even with this quick-stash option, I’ve gone for the faster option of just dropping it in my crotch on a number of occasions.
General safety advice
The most important thing you can do is not take chances just to get a picture. Wait until you’re on a road where you can see a good distance ahead. Practice pulling the camera out of your bag / pocket, turning it on, taking a picture, and putting it away while sitting still on your bike, and then when you’re on long straightaways. It’s not important what you’re taking a picture of. It doesn’t matter if it’s even in focus. You just need to build up the muscle-memory until you get to the point that you can do it without ever looking down.
I have essentially zero pictures from the Sierra Madre Oriental because Mexican roads love potholes, that mountain range is covered covered with tight curves that The Tail of the Dragon becomes a joke, you never know what’s going to be coming around the next corner (or which lane it’ll be in), and at that point in the trip I simply didn’t have the experience to make it worth the risk. I don’t regret this lack of pictures one bit.
Plus, you can always get a helmet cam and turn it on through the twisties.
Where to keep it
My advice is to keep your camera in your tank bag. Just leave the end open enough that you can easily reach in and pull it out without having to worry about loosing everything else in there. I don’t like using jacket pockets, because they’re harder to get the camera in and out of and you want the default place you put your camera away when you’re focusing on more important things, to be fast and easy.
Choosing a Camera
If you’re going on a long ride you’ll want two cameras. One that takes good pictures, and one that is easy to manipulate while riding. I’m going to be talking about the latter.
Camera Type
This part is simple. You need a point-and-shoot. You want a ruggedized point-and-shoot. Look for ones that advertise being shock-resistant and waterproof. These can usually be dropped from about six feet onto hard surfaces with nothing more than superficial scuffing. The waterproofing helps give you some piece of mind when you want to start shooting in a light rain.
The downside to ruggedized cameras is that the quality is simply not as good as normal ones. I think this is acceptable, because you will drop your camera. It will whack against the side of your tank, or fairings, and sooner or later it will start having issues as a result. Normal cameras are simply not designed for this sort of treatment; better to have a camera that will stand up to the types of usage you’ll be exposing it to than a camera that will take better pictures for only the first half of your trip.
The grip
Most people are right-handed, so most cameras are designed for easy shooting and manipulation with the right hand. The problem is that when you’re on a motorcycle you’re not just left handed. You’re a left-handed amputee.
Go into your local camera store and pick up the point-and-shoots with your left hand. Can you turn it on-and-off left handed? Can you press the shutter button without blocking the lens? A number of point-and-shoot cameras put the lens in the top left corner. When riding your hand will want to curve over and grip this corner, which means you’ll probably have your glove in half of the shots. You can make these cameras work, but it may require a fairly awkward grip.
The best option is to bring your motorcycle gloves with you. Once you know where the buttons are close your eyes and see if you can manipulate everything without looking, using only your left hand.
The Buttons
You want a camera with big buttons that poke out significantly. You’ll have to turn the camera on, off, take pictures, and maybe even zoom, left handed without looking. Now, you’re not just a left-handed amputee, you’re a blind left-handed amputee.
Many of todays point-and-shoot cameras are intentionally trying to make buttons that are smooth and almost flat along the side of the camera. Avoid these. You’ll have a very hard time finding the button when wearing gloves, never mind knowing if you’ve successfully pressed it.
While it’s important that the buttons you need to toggle the power and take a shot are easy to find and manipulate, it’s also important that the other buttons on the camera stay out of your way when you’re taking a picture, or simply holding it left handed. You don’t want it going into your settings menu when you’re trying to take a picture of the ostrich running alongside your bike.
The screen / viewfinder
The screen and viewfinder do not matter at all. You can’t look through a viewfinder when wearing a helmet, and you’d be pretty crazy to try riding while looking through one even if you could. Similarly, you can’t afford to be watching a little screen instead of the road. You will be shooting blind.
Zoom
As with all cameras, optical zoom is the only zoom you should care about. Ignore digital zoom entirely. The software in whatever photo app you use on your computer can do digital zoom just as well as your camera. It is much better to have photos from your camera that haven’t been mucked-with in software.
With that in mind, you want fast zoom. The default zoom level of every point-and-shoot is too small for the vast majority of cool things you’ll see in the distance and want a picture of, so once you get comfortable taking shots you’re going to start fiddling with the zoom too. I will typically grab the camera, turn it on, and zoom all the way before taking the shot. After you’ve done it enough times you’ll have a good feel for how long it takes to reach maximum (optical) zoom and not need to check. It is rare that this results in being too zoomed in since you’re rarely shooting at anything closer than 20 feet away.
As with the buttons you want a big, easy to manipulate zoom control.
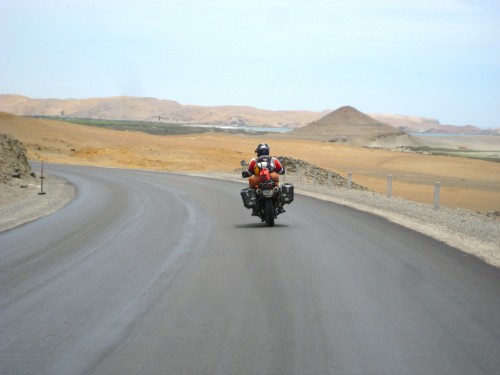
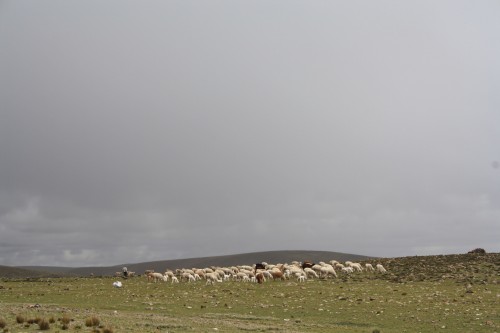 (Sometimes you just don’t have time for zoom)
The camera I used for the shots in this post had one of those telescoping lenses that slowly slid out when you turned on, and would slowly retract when you turned it off. I missed a number of shots because I simply couldn’t get it to turn on, and be ready to shoot before I’d ridden past the subject. It was even worse if I needed to wait for it to zoom.
Ruggedized cameras typically have less optical zoom, because the lens is sealed behind a clear pane of waterproof glass/plastic. This hurts your ability to photograph distant objects but the lack of big extending tubes enhances your ability to take pictures quickly, and put the camera away fast.
Power On & Off Speed
You need a camera that turns on fast. What’s fast enough for someone walking around with a camera is not nearly fast enough when shooting from a motorcycle. You want as close to instant on as you can get, and by “on” I mean on, and ready to take a picture. If a lens emerges from it before it can shoot you need that lens to emerge fast. You really want the camera to be ready to start taking pictures in less than half a second. It makes a huge difference. Similarly, you want it to be able to be safely dropped in your bag / crotch as quickly as possible, and that means fast off speed without worrying if the lens is fully retracted or not.
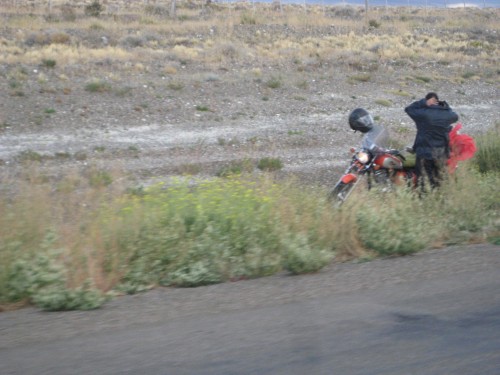
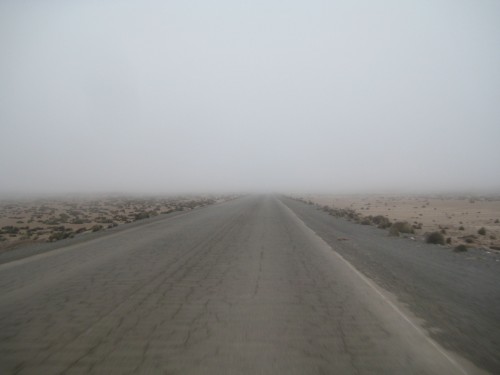 (It’s probably not a good idea to keep shooting when you hit that cloud-bank)
Time between shots
You need a camera that doesn’t make you wait between pictures. It’s annoying when you’re walking around. It’s doubly so when on the bike, because you either have to keep glancing down at the thing to see if it’s ready yet, or just click and hope. I usually go with the latter.
GPS
A number of the point-and-shoots are starting to offer GPS functionality built in. The technology is still fairly new when it comes to cameras and the reviews have been mixed. While it’s definitely nice to have geocoded photos, it may not be worth the extra battery drain, or time required to acquire decent precision from the satellites. For now, consider it a nice-to-have but not something to base your decision on unless all other things are roughly equal.
Taking good pictures
There are two keys to taking good pictures on the bike. Practice, and plenty. Practice taking plenty of shots. Never take just one shot. Take three. Most of the pictures you take on-the-bike will be pure crap. They’ll be crooked. They’ll be blurry. They’ll have the subject off in a corner. Don’t worry about it, and don’t try and see how well the shots came out while riding. Take the pictures, take some more just in case, then put it away and look when you stop to take a break.
Another thing that will help your on-the-bike shooting is to practice shooting moving objects when you’re off the bike. Off the bike, try taking pictures of cars moving past you at speed, or runners right when they go past you on the sidewalk. Learn to move your camera at a speed that matches their motion and keeps them in focus, while the world around them is blurred. Getting shots of stationary objects while you pass them from a moving bike requires exactly the same skill. You need to pivot the camera to keep it pointed at the llama right as you pass it.
Eventually you’ll start getting a higher percentage of your shots that come out ok. I’m up to about 1 in 20 that are good, a handful of the remaining ones are worth keeping just for the memory, and the rest just get deleted.